I wanted to run our MuleSoft applications on Kubernetes to take advantage of its scalability and efficiency. While MuleSoft Runtime Fabric (RTF) lets you do this, I quickly discovered a major limitation: it doesn’t support native autoscaling. You can only scale manually through the Anypoint Platform. This was a deal-breaker for our production environment. So, I figured out how to implement our own autoscaling using Kubernetes HorizontalPodAutoscalers (HPAs). Here’s my complete guide to setting up a production-ready, autoscaling MuleSoft environment on GKE.
My Architecture
The architecture I landed on uses a single GKE cluster with separate namespaces for each environment (dev, staging, prod). This is cost-efficient and allows for great environment separation. The MuleSoft control plane manages the deployments, but I use Kubernetes-native HPAs to handle the scaling.
graph TB
    subgraph Anypoint Platform
        AM[Anypoint Management]
        RM[Runtime Manager]
        API[API Manager]
    end

    subgraph GKE Cluster
        subgraph Dev Namespace
            DevRTF[Runtime Fabric Agent]
            DevApp1[Mule App 1]
            DevApp2[Mule App 2]
            DevHPA1[HPA]
        end

        subgraph Staging Namespace
            StgRTF[Runtime Fabric Agent]
            StgApp1[Mule App 1]
            StgHPA1[HPA]
        end

        subgraph Production Namespace
            ProdRTF[Runtime Fabric Agent]
            ProdApp1[Mule App 1]
            ProdApp2[Mule App 2]
            ProdHPA1[HPA]
            ProdHPA2[HPA]
        end
    end

    RM --> DevRTF
    RM --> StgRTF
    RM --> ProdRTF

    DevHPA1 -.->|Autoscale| DevApp1
    StgHPA1 -.->|Autoscale| StgApp1
    ProdHPA1 -.->|Autoscale| ProdApp1
    ProdHPA2 -.->|Autoscale| ProdApp2

    style Anypoint Platform fill:#00a0df,color:#fff
    style Production Namespace fill:#4caf50,color:#fff
The Setup Process
Here are the steps I follow to get everything up and running.
Step 1: Prepare the GKE Cluster
First, I prepare a GKE cluster optimized for MuleSoft workloads, making sure the HorizontalPodAutoscaling addon is enabled.
gcloud container clusters create mulesoft-cluster \
  --region=us-central1 \
  --num-nodes=3 \
  --machine-type=n2-standard-4 \
  --enable-autoscaling \
  --min-nodes=3 \
  --max-nodes=10 \
  --addons=HorizontalPodAutoscaling,HttpLoadBalancing
Step 2-3: Configure Anypoint Platform
In the Anypoint Platform, I create three environments: Development, Staging, and Production. This allows me to logically separate my deployments.
Step 4: Install Runtime Fabric
Next, I follow the official MuleSoft guide to install the RTF agent into my cluster. This involves getting an installation command from the Anypoint Platform’s Runtime Manager and running it with kubectl.
After the installation, I verify that the rtf-agent and other components are running in the rtf namespace.
Step 5: Associate RTF with Environments
This is a crucial step. In Runtime Manager, I associate my newly created RTF with the Development, Staging, and Production environments. This allows me to deploy applications to any of these targets from the same control plane.
Step 6: Deploy a Test Application
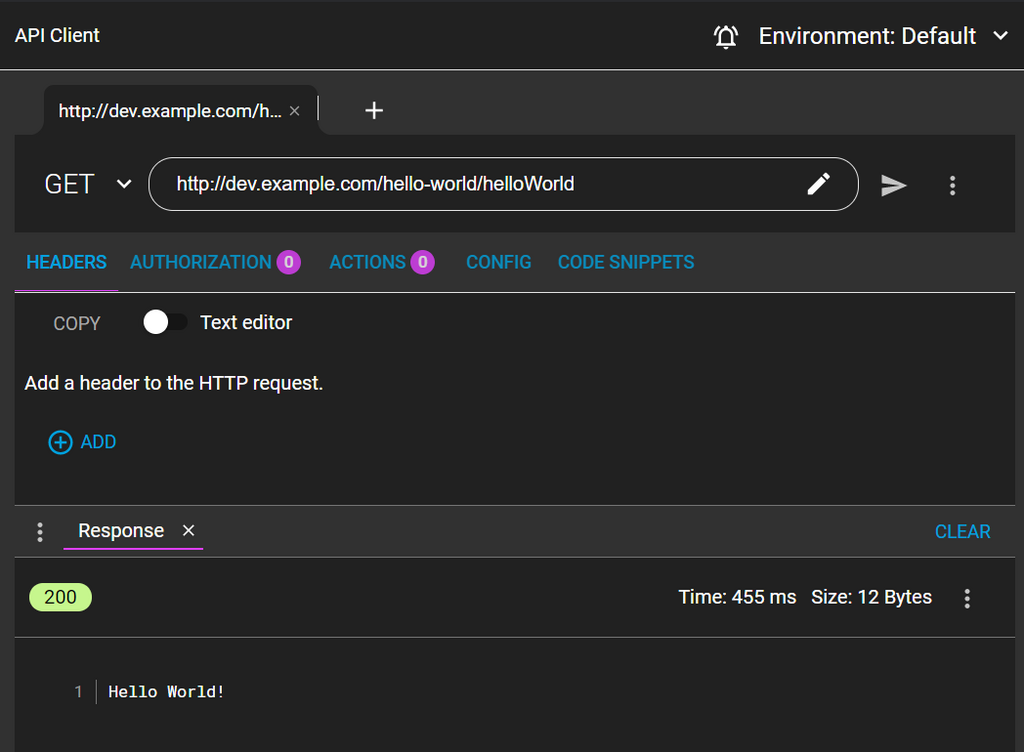
To test the setup, I deploy a simple “hello-world” application from the Anypoint Exchange into my dev environment. I configure it to run with 1 replica.
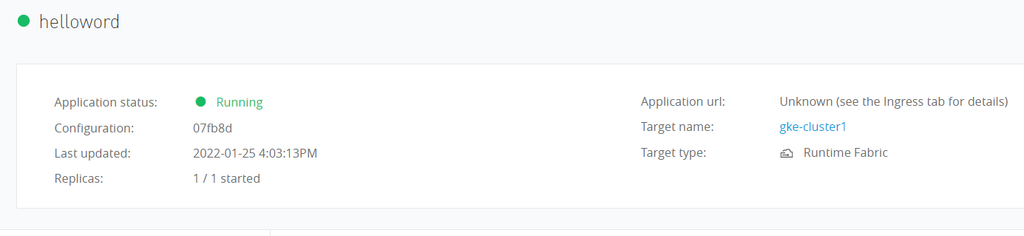
After deploying, I can test the endpoint to make sure it’s working.
Step 7: Implementing the HPA for Autoscaling
Now for the most critical part: implementing the autoscaling that MuleSoft RTF lacks. I do this by creating a HorizontalPodAutoscaler (HPA) resource for each Mule application I deploy.
To create the HPA, I need two key pieces of information:
- The Environment ID from Anypoint Platform, which RTF uses as the Kubernetes namespace.
- The Application Name, which becomes the name of the
Deploymentresource created by RTF.
I then create a YAML manifest for the HPA. In the spec, I point scaleTargetRef to the application’s Deployment. I configure it to scale based on CPU and memory utilization—for example, scaling up when CPU exceeds 70%.
# hpa-hello-world.yaml
apiVersion: autoscaling/v2
kind: HorizontalPodAutoscaler
metadata:
  name: hello-world-dev
  namespace: <environment-id>  # The ID from Anypoint Platform
spec:
  scaleTargetRef:
    apiVersion: apps/v1
    kind: Deployment
    name: hello-world-dev      # The application name
  minReplicas: 1
  maxReplicas: 10
  metrics:
  - type: Resource
    resource:
      name: cpu
      target:
        type: Utilization
        averageUtilization: 70
  behavior:
    scaleDown:
      stabilizationWindowSeconds: 300 # Wait 5 min before scaling down
    scaleUp:
      stabilizationWindowSeconds: 0   # Scale up immediately
I apply this manifest with kubectl apply -f hpa-hello-world.yaml and can then watch the HPA manage my application’s replicas.
Step 8: Testing the Autoscaling
To see it in action, I generate load against the application endpoint using a tool like hey.
hey -z 5m -c 100 http://<service-endpoint>/helloAs the CPU load increases, I can watch the HPA automatically create new pods to handle the traffic by running kubectl get hpa -n <environment-id> -w.
My Production Strategy
To make this repeatable, I wrote a shell script that generates and applies the HPA manifest for any given application. This allows me to easily enforce different scaling rules for different environments—for example, allowing dev to scale to zero, but keeping a minimum of 3 replicas in production.
# Example usage of my script
./deploy-mule-app-with-hpa.sh api-orders dev-env-id 1 5
./deploy-mule-app-with-hpa.sh api-orders stg-env-id 1 10
./deploy-mule-app-with-hpa.sh api-orders prod-env-id 3 50
Final Thoughts
Running MuleSoft on Kubernetes has been a game-changer for us, but only after I solved the autoscaling challenge with HPAs. My key takeaway is that for every app I deploy via the Anypoint UI, I need a corresponding HPA managed via GitOps. It’s crucial to set proper resource requests in Anypoint and then tune the HPA thresholds based on real-world load. This hybrid approach—deploying from MuleSoft’s control plane but managing scaling with Kubernetes-native tools—gives me the best of both worlds: centralized management and production-grade, automated scalability.
Related Articles
- GKE Cluster Operations - Provision GKE for MuleSoft
- Kafka on Kubernetes - Integrate with Kafka
- Kubernetes Dashboard Access - Monitor MuleSoft apps