Managing production GKE clusters requires a solid, repeatable process. I’ve learned that careful planning around provisioning, networking, and especially upgrades is key to stability. Here, I’ll walk you through the lifecycle I follow, from creating a new cluster in a Shared VPC to performing safe, zero-downtime upgrades.
My Architecture: Hub & Spoke with Shared VPC
For my projects, I’ve found a Hub & Spoke model using a Shared VPC to be the most effective architecture. It allows for centralized network management, which is great for security and cost efficiency, and simplifies peering.
graph TB
    subgraph Host Project
        SharedVPC[Shared VPC Network]
        Subnet1[Subnet: us-central1]
        Subnet2[Subnet: europe-west1]
        Subnet3[Subnet: asia-southeast1]

        SharedVPC --> Subnet1
        SharedVPC --> Subnet2
        SharedVPC --> Subnet3
    end

    subgraph Service Project 1
        GKE1[GKE Cluster 1<br/>Production]
        SA1[GKE Service Account]
    end

    subgraph Service Project 2
        GKE2[GKE Cluster 2<br/>Staging]
        SA2[GKE Service Account]
    end

    SA1 -.->|Network User| Subnet1
    SA2 -.->|Network User| Subnet2
    GKE1 --> Subnet1
    GKE2 --> Subnet2

    style Host Project fill:#4285f4,color:#fff
    style SharedVPC fill:#0f9d58,color:#fff
Part 1: Creating a GKE Cluster with Shared VPC
Setting up a GKE cluster in a service project that uses a Shared VPC from a host project is a common pattern. Here’s how I do it.
Step 1: Identify the GKE Service Account
First things first, I need to get the right permissions set up. When you enable the GKE API in a service project, Google creates a special service account for it. I start by finding that account.
# Enable GKE API
gcloud services enable container.googleapis.com --project=<service-project-id>

# Find the GKE service account
gcloud iam service-accounts list --project=<service-project-id> | grep container-engine-robot
The service account will look something like service-<project-number>@container-engine-robot.iam.gserviceaccount.com.
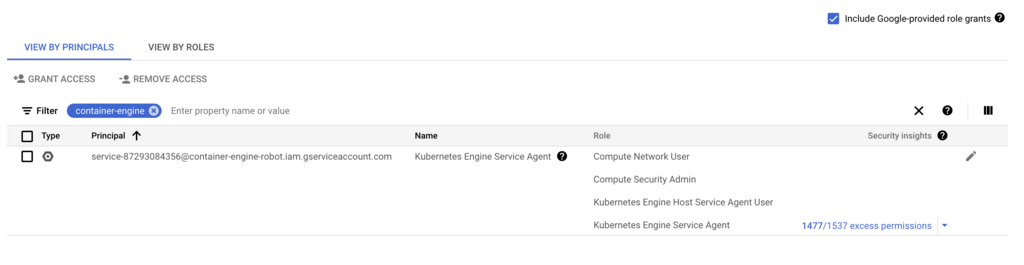
Step 2: Grant IAM Permissions in the Host Project
Next, this service account needs permissions in the host project where the Shared VPC lives. I grant it the compute.networkUser, compute.securityAdmin, and container.hostServiceAgentUser roles.
# Set variables
export HOST_PROJECT_ID="network-host-project"
export SERVICE_PROJECT_NUMBER="123456789"  # Not project ID, the numeric ID
export GKE_SA="service-${SERVICE_PROJECT_NUMBER}@container-engine-robot.iam.gserviceaccount.com"

# Grant necessary roles
gcloud projects add-iam-policy-binding ${HOST_PROJECT_ID} \
  --member="serviceAccount:${GKE_SA}" \
  --role="roles/compute.networkUser"

gcloud projects add-iam-policy-binding ${HOST_PROJECT_ID} \
  --member="serviceAccount:${GKE_SA}" \
  --role="roles/compute.securityAdmin"

gcloud projects add-iam-policy-binding ${HOST_PROJECT_ID} \
  --member="serviceAccount:${GKE_SA}" \
  --role="roles/container.hostServiceAgentUser"
Step 3: Verify Subnet Permissions
I also make sure the service account has permissions at the subnet level.
gcloud compute networks subnets add-iam-policy-binding <subnet-name> \
  --region=us-central1 \
  --project=${HOST_PROJECT_ID} \
  --member="serviceAccount:${GKE_SA}" \
  --role="roles/compute.networkUser"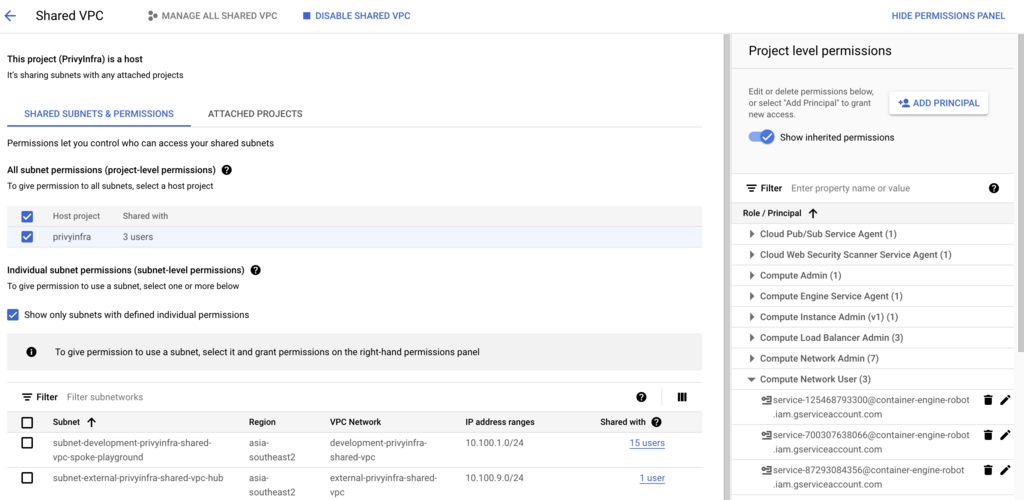
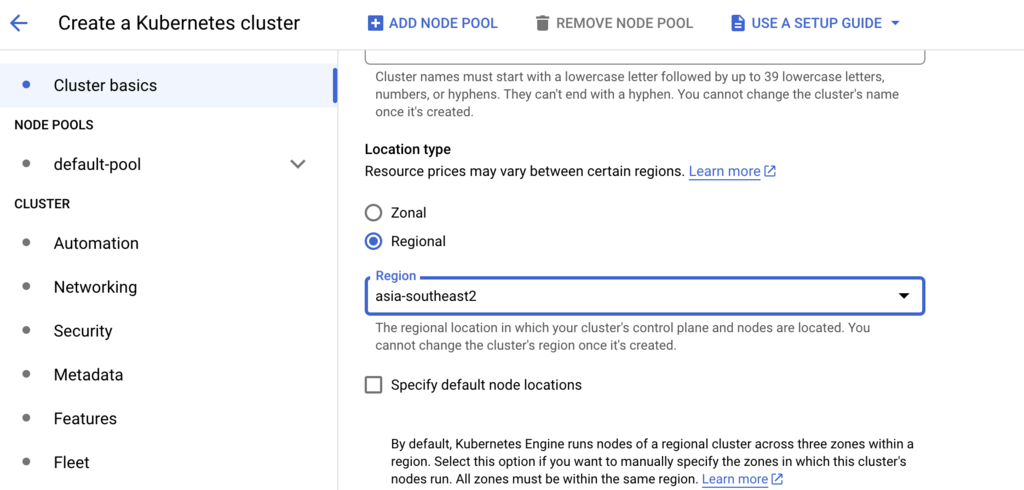
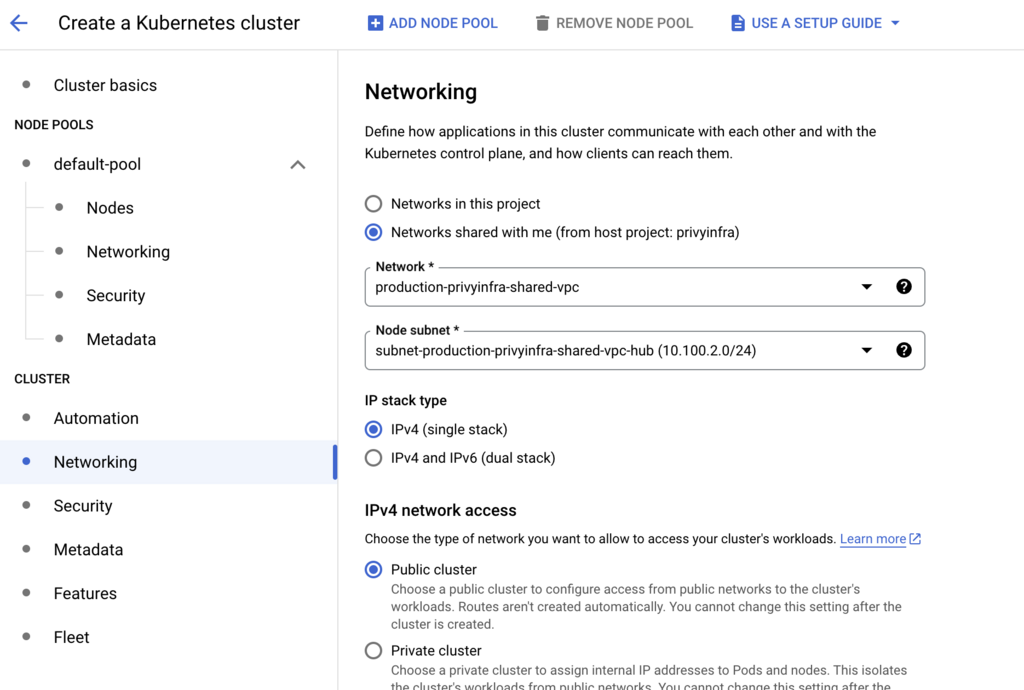
Step 4: Create the GKE Cluster
With the permissions in place, I can now create the GKE cluster itself. I use a gcloud command with all my preferred production settings, making sure to specify the full path to the shared network and subnetwork.
gcloud container clusters create production-cluster \
  --region=us-central1 \
  --network=projects/${HOST_PROJECT_ID}/global/networks/shared-vpc \
  --subnetwork=projects/${HOST_PROJECT_ID}/regions/us-central1/subnetworks/gke-subnet \
  --enable-ip-alias \
  --cluster-secondary-range-name=pods \
  --services-secondary-range-name=services \
  --enable-private-nodes \
  --enable-private-endpoint \
  --master-ipv4-cidr=172.16.0.0/28 \
  --enable-master-authorized-networks \
  --master-authorized-networks=10.0.0.0/8,172.16.0.0/12 \
  --num-nodes=3 \
  --machine-type=n2-standard-4 \
  --disk-size=100 \
  --disk-type=pd-ssd \
  --enable-autoscaling \
  --min-nodes=3 \
  --max-nodes=10 \
  --enable-autorepair \
  --enable-autoupgrade \
  --addons=HorizontalPodAutoscaling,HttpLoadBalancing,GcePersistentDiskCsiDriver \
  --project=<service-project-id>
After running the command, I always double-check the cluster description to confirm it’s configured correctly.
Part 2: My Production GKE Cluster Command
Here is the full command I use for provisioning a production-ready cluster, with all the bells and whistles like private nodes, specific machine types, and managed Prometheus.
gcloud container clusters create cluster-production \
  --region=australia-southeast1 \
  --no-enable-basic-auth \
  --cluster-version="1.28.7-gke.1026000" \
  --release-channel=None \
  --machine-type=n2-standard-8 \
  --image-type=COS_CONTAINERD \
  --disk-type=pd-balanced \
  --disk-size=100 \
  --metadata=disable-legacy-endpoints=true \
  --scopes=https://www.googleapis.com/auth/devstorage.read_only,\
https://www.googleapis.com/auth/logging.write,\
https://www.googleapis.com/auth/monitoring,\
https://www.googleapis.com/auth/servicecontrol,\
https://www.googleapis.com/auth/service.management.readonly,\
https://www.googleapis.com/auth/trace.append \
  --max-pods-per-node=110 \
  --num-nodes=1 \
  --logging=SYSTEM,WORKLOAD \
  --monitoring=SYSTEM \
  --enable-private-nodes \
  --master-ipv4-cidr=10.41.4.0/28 \
  --enable-ip-alias \
  --network=projects/<host-project>/global/networks/production-vpc \
  --subnetwork=projects/<host-project>/regions/australia-southeast1/subnetworks/subnet-production-vpc \
  --no-enable-intra-node-visibility \
  --default-max-pods-per-node=110 \
  --security-posture=disabled \
  --workload-vulnerability-scanning=disabled \
  --enable-master-authorized-networks \
  --master-authorized-networks=103.165.152.0/23,103.109.155.176/29,43.252.73.56/29 \
  --addons=HorizontalPodAutoscaling,HttpLoadBalancing,GcePersistentDiskCsiDriver \
  --no-enable-autoupgrade \
  --enable-autorepair \
  --max-surge-upgrade=1 \
  --max-unavailable-upgrade=0 \
  --enable-managed-prometheus \
  --enable-shielded-nodes \
  --node-locations=australia-southeast1-a,australia-southeast1-c \
  --project=<project-id>
Part 3: My Safe Cluster Upgrade Strategy
Upgrades are where things can get risky if you’re not careful. I’ve developed a checklist that I follow religiously to ensure zero downtime.
graph TB
    Start[Plan Upgrade] --> Check1[Check API Deprecations]
    Check1 --> Check2[Review Release Notes]
    Check2 --> Backup[Backup Critical Data]
    Backup --> Internal[Deploy Internal Ingress]
    Internal --> Ingress[Migrate Ingress Resources]
    Ingress --> Chart[Bump Chart Versions]
    Chart --> Test[Test in Staging]
    Test --> Decision{All Tests Pass?}
    Decision -->|No| Fix[Fix Issues]
    Fix --> Test
    Decision -->|Yes| ControlPlane[Upgrade Control Plane]
    ControlPlane --> NodePool[Create New Node Pool]
    NodePool --> Drain[Drain Old Nodes]
    Drain --> Verify[Verify Workloads]
    Verify --> Complete[Upgrade Complete]

    style Start fill:#4285f4,color:#fff
    style Complete fill:#0f9d58,color:#fff
    style Decision fill:#ffd,stroke:#660
Step 1: Check for API Deprecations
My first step is always to check for API deprecations. The kubectl-deprecations krew plugin is a lifesaver here.
# Install krew and the plugin
( set -x; cd "$(mktemp -d)" && OS="$(uname | tr '[:upper:]' '[:lower:]')" && ARCH="$(uname -m | sed -e 's/x86_64/amd64/' -e 's/\(arm\)\(64\)\?.*/\1\2/' -e 's/aarch64$/arm64/')" && KREW="krew-${OS}_${ARCH}" && curl -fsSLO "https://github.com/kubernetes-sigs/krew/releases/latest/download/${KREW}.tar.gz" && tar zxvf "${KREW}.tar.gz" && ./${KREW} install krew)
export PATH="${KREW_ROOT:-$HOME/.krew}/bin:$PATH"
kubectl krew install deprecations

# Check for APIs deprecated in the target version
kubectl deprecations --k8s-version=v1.28.0
Step 2: Deploy an Internal Ingress Controller
Before a major upgrade, I’ve learned it’s safer to deploy a new, internal-only ingress controller. This decouples my ingress from the cluster’s default and gives me more control during the transition. I configure it to use a different webhook port and an internal load balancer.
Step 3-5: Prepare Manifests and Push
I then migrate my Ingress resources to a separate GitOps-managed folder, disable the ingress sections in my Helm charts, and bump the chart versions. I use a little Python script to automate the version bumping. After committing and pushing these changes, I update my upstream load balancer to point to the new internal ingress IP.
Step 6: Upgrade the Control Plane
Once the prep work is done, I start the actual upgrade, beginning with just the control plane. This is a crucial step to minimize risk.
gcloud container clusters upgrade production-cluster \
  --region=us-central1 \
  --cluster-version=1.28.7-gke.1026000 \
  --master \
  --project=<project-id>
Step 7: Create a New Node Pool
Instead of upgrading node pools in-place, I prefer the “create and drain” method. I create a brand new node pool with the target version.
gcloud container node-pools create pool-1-28 \
  --cluster=production-cluster \
  --region=us-central1 \
  --machine-type=n2-standard-8 \
  --node-version=1.28.7-gke.1026000 \
  ...
Step 8: Drain the Old Node Pool
Then, I carefully cordon and drain the old nodes one by one, watching my monitoring dashboards to ensure workloads migrate smoothly.
for node in $(kubectl get nodes -l cloud.google.com/gke-nodepool=default-pool -o name); do
  echo "Draining $node..."
  kubectl drain $node --ignore-daemonsets --delete-emptydir-data --force --grace-period=300
  echo "Waiting 2 minutes before next node..."
  sleep 120
done
Step 9-10: Verify and Delete
Only after I’ve verified everything is running perfectly on the new nodes (kubectl get pods -o wide --all-namespaces | grep -v pool-1-28 should be empty) do I delete the old node pool.
gcloud container node-pools delete default-pool ...My Key Takeaways
Through many upgrades, I’ve learned a few non-negotiable best practices. Always test in a staging environment first, read the release notes thoroughly, and have a documented rollback plan. The “create and drain” method for node pools has proven much safer than in-place upgrades. It’s also critical to check for API deprecations before you start and to ensure you have proper Pod Disruption Budgets configured. By following this methodical process, I can perform major GKE upgrades with confidence and without disrupting production services.
Related Articles
- Google Cloud Run - Alternative to GKE for simpler workloads
- MuleSoft on Kubernetes - Deploy MuleSoft on GKE
- Kafka on Kubernetes - Run Kafka on GKE
- Vault with GCP KMS - Secure secrets on GKE